IT 10 FINAL EXAM
Part 1 – Photoshop Picture
You are to edit a photo using Photoshop. Choose any skill that we learned this year (clone stamp, colourizing, lightning, etc) and edit any photo of your choice (must be school appropriate). The photo above is an example of using the clone stamp project. This was done by a gr 10 student at SRT. *Spend time on this. Make it look good.
o Save your file as a jpeg. Upload it to http://padlet.com/wall/wh7o5ph3je
o Important – once your file has been uploaded on padlet, name it with your student number
Part 2 - Design a webpage using Adobe Dreamweaver.
Your webpage must include:
- A title (Your Name)
- A header with different style attributes, ie: color, size and font (The Photoshop Effect you used in your editing)
- A picture of your original photo that links to the website you got it from when you click on it
- A heading above the original photo that says “Before”
- A picture of your Photoshopped photo (use the link from the padlet – click on your photo and then click on “source” to view the url)
- A heading above your Photoshopped photo that says “After”
- A paragraph outlining what you learned this year in IT10. What did you like? What didn’t you like? What do you think your work habit mark should be (E,G,S or N) and why?
- Add any other extras that you want (i.e. background colour, etc)
- Once you’re finished save your file and upload it onto http://padlet.com/wall/66j6rgcndd
- YOU CAN ALSO SEE AN EXAMPLE BY CLICKING ON THE LINK ABOVE
- Again - once your file has uploaded onto padlet, name it with your student number
ASSIGNMENTS
June 3
HTML Structure: Tables, Divs, and Spans
HTML Basics III
Project: Clickable Photo Page
May 27
HTML Basics II
1. Making lists
2. Styling the font!
3. More nice styling!
Project: Social Networking Profile
May 22
Beginner HTML Coding
1. Create an account at www.codeacademy.com
2. Complete the HTML basics exercises.
3. Complete the Project: Build Your Own Webpage
4. Once you've completed all of the above show me!
May 13
Creating Realistic Explosions in After Effects
Tutorial Link
Free Footage Link
May 1
Shattering Glass with After Effects
Baseball File
Broken Glass File
Tutorial
Apr 29
Continue with After Effects.
Try this tutorial on Animating a 3D Path.
This tutorial builds on what we were doing before.
Apr 17 -
Stop Motion Assignments are due today.
After Effects Assignment.
Here's the video we watched that gave us an overview of After Effects
Today's Assignment
1. Create a new composition: Choose Composition > New Composition. (Press Ctrl+N)
2. Change the Duration value in the Composition Settings dialog box by entering 5.00 (5 seconds), choose Web Video from the Preset menu, and click OK.
3. Create a new text layer: Choose Layer > New > Text. (Press Ctrl+Alt+Shift+T)
4. Type your name. Press Enter on the numeric keypad or press Ctrl+Enter (Windows) on the main keyboard to exit text-editing mode.
5. Set an initial keyframe for the Position property:
Click the triangle to the left of the layer name in the Timeline panel, click the triangle to the left of the Transform group name, and then click the stopwatch button to the left of the Position property name.
7. Activate the Selection tool:
Click the Selection Tool button in the Tools panel.Using the Selection tool, drag your text to the bottom-left corner of the frame in the Composition panel.
8. Move the current-time indicator to the last frame of the composition: Drag the current-time indicator in the Timeline panel to the far right of the timeline. Press End.
9. Using the Selection tool, drag your text to the top-right corner of the frame in the Composition panel.
A new keyframe is created at this time for the Position property. Motion is interpolated between keyframe values.
10. Preview your animation using standard preview: Click the Play button in the Preview panel. Click Play again to stop the preview. Press the spacebar. Press the spacebar again to stop the preview.
11. Apply the Glow effect: Choose Effect > Stylize > Glow.
12. Add your composition to the render queue: Choose Composition > Add To Render Queue.
In After Effects CS6, choose File > Export > Add to Render Queue.
13. In the Render Queue panel, click the underlined text to the right of Output To. In the Output Movie To dialog box, choose a name and location for the output movie file, and then click Save. For the location, choose something easy to find, like your desktop.
14. Click the Render button to process all items in the render queue. The Render Queue panel show
Apr 5 - Stop Motion
Here's a link to a video on how to use photoshop cs6 to make our stop motion movie.
Feb 20 - Some Stop Motion Tips
Frame capture Advice
You can get very good results with 15 frames per second. If you really want smooth results than you can try 20 frames per second.
Capture 12 to 15 frames when introducing or opening a scene before your characters animate or move. This is sometimes called setting the scene. But also remember 15 frames is only 1 second at 15 fps. So it will pass very quickly.
Its normal to capture one frame per movement but you can experiment with two frames if you wish.
A pause usually lasts a half a second ..so that means seven to eight frames for example between characters talking back and forth to each other.
When you want to make your character blink just take 3 frames with the eye closed (at 15 fps )
To finish out a scene take twelve to fifteen frames.
Remember that all movements must be small so the animation is smooth and flowing
Review your movie as you go along. Some software has a loop function which can be useful. Also remember to save your movie regularly or better still use an auto save function if your software has it.
(from http://www.stopmotioncentral.com/articles-7.html)
Feb 18 - Stop Motion Assignment
Requirements (RUBRIC)
- Length minimum of 2 minutes.
- Creative storyline with high school appropriate content only.
- Creative use of props and background set.
- Background music.
- Synchronized sound effects and/or voice over dialog.
- Titles.
First Step: Treatment & Storyboard
Choose the type of Stop Motion medium you will use –actors, clay, legos, other props
1. Write a story treatment.
A story treatment is a one-paragraph description of the basic storyline of your animation. Remember, a good story includes a protagonist, antagonist, conflict/obstacle/problem, a solution to the problem and a climax.
2. Create a storyboard.
Remember you storyboard must include:
The title frames (opening and closing).
The framing of the shot (Close-up, Long-Shot, Medium-Shot, etc)
The frame transitions (Zoom, Pan, Fade-in, Fade-out).
In the text area, describe what is happening in the shot.
Describe audio (music or voice overs).
Look at this Sample Storyboard.
Here is a copy of the Storyboard Template to sketch your frames.
You must have a minimum of 3 pages of storyboards (24 frames).
Evaluation
Your final project will be assessed on both technical and creative ability:
- Is your frame rate correct? You will know this because your animation will be smooth and not choppy – think 12 pictures for every second of animation!
- Are your sound effects and music right for your animation? You will know this because the two will flow together – music is supposed to support your animation no compete with it
- Have you filled your frame with only what is important to your animation?
- Have you created an appropriate set or environment for your animation?
- Have you edited your images using photoshop to remove anything that is unwanted such as hands?
- Do you have a story? Is there something that brings the viewer from the beginning to the end of your animation?
- Are your images in the right sequence?
- Are your images in focus?
Jan 23 - Kodu Game Design Template
Template
Jan 21 - Replicate an Old Arcade Game
Help File
Dec 7 - Flash Car Audio Animation
See clconline for assignment details.
Tutorial
Start Sound
Engine Sound
Car
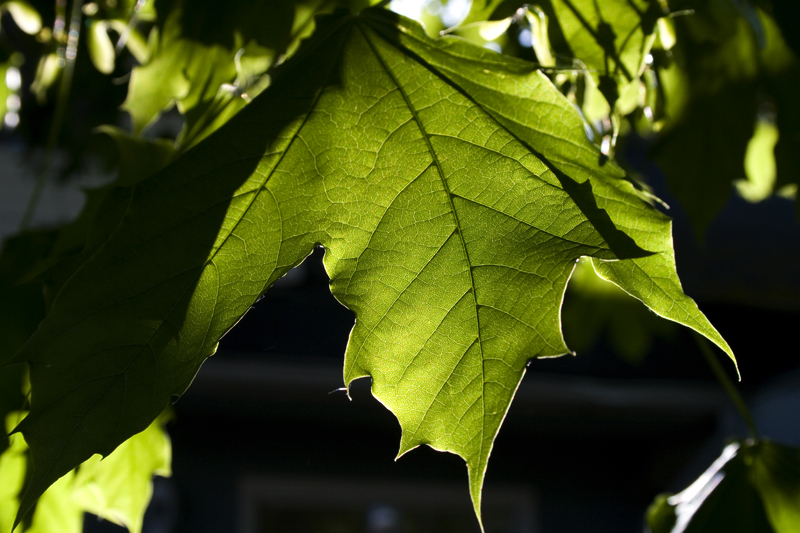
Oct 10 - Photoshop - Water Droplets
Use Photoshop to add water droplets to a photo.
Click here for the tutorial.
Click here for a photo of a leaf.
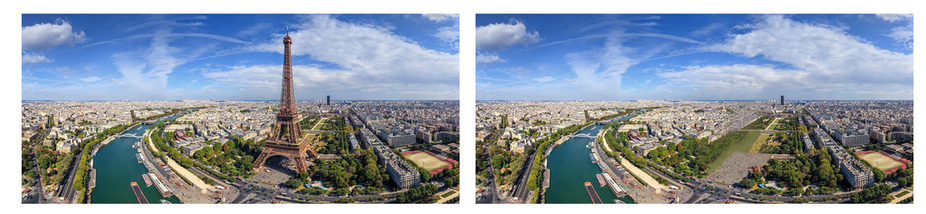
Oct 5 Photoshop - Starry Night
Use photoshop to add a starry night effect to a photo.
Click here for the tutorial.
Click here for a photo of the eiffel tower.
Sept 28 - Photoshop - Colourize a black and white photo
Choose a black and white photo and change it into a colour photo. Click here to see the tutorial.
If you're having trouble finding a picture use this one.
Sept 26 - Photoshop - Create a Lightening Bolt
From Photoshop Assignment Folder
Sept 19 - Photoshop Clone Stamp
Remove the bridge and the shadow from this picture.
Sept 14 - Photoshop Mini Lesson
Working by yourself or with a partner you are going to prepare a mini-lesson on photoshop. It will be up to you to figure out everything you need to know about your chosen topic and teach it to the rest of the class. You will also need to design an assignment that will allow the rest of the class to practice the skill that you just taught them (search for tutorials on your chosen topic – they will not only teach you how to use the skill but give you ideas for possible assignments).
Click here to download a copy of the assignment.
Sept 10 - Photoshop
This assignment is your chance to play with photoshop and show me what you know.
For those of you with more photoshop experience your task is to find a landscape picture and turn it into something new. See this photoshop contest on this website for an example: (they took a picture of a Scottish rock formation and turned it into a new picture).
For those of you with limited photoshop experience your task is to play around with some of the tools and functions in photoshop. I want you to play around and get a better understanding of what photoshop can do. Take a look at the tutorials on this website and start with the one that seems to be at the level that you are at.
